Flying is learning how to throw yourself at the ground and miss.  After five weeks of summer school and many rookie pilots our quadcopters have seen better days. By far the most damaged item on the quadcopter is the prop guard. If you are not familiar with the prop guards they vary by brand with some of them completely encompassing the quadcopter with others not covering anything. Our quadcopter of choice the SJ-X300 came equipped with prop guards that were pressure fit on using three small plastic pegs. While this design allowed for quick and easy assembly it was lack luster in regards to performance. On many occasions a hard landing would cause a few of the prop guards to pop off and become lost in the grass. We attempted to remedy this by painting them a variety of colors to no avail as they continued to disappear into the grassy abyss.
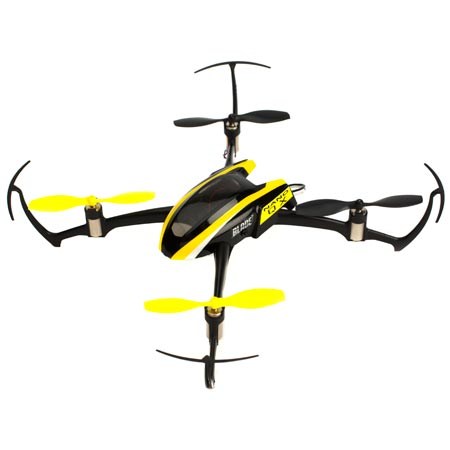
With the plethora of quadcopters we had in class students grouped up to tackle the challenge of redesigning prop guards. Some students completely redesigned the quadcopters while others stayed with a more traditional approach. The design that had the highest level of technical difficulty and best print outcome was created by a young man who only borrowed a nut and bolt file from the thingiverse and totally designed the rest of his project from scratch. What is the Thingiverse??? (TheThingiverse is a website dedicated to the sharing of user-created digital design files. Providing primarily open source hardware designs licensed under the GNU General Public License or Creative Commons licenses, users choose the type of user license they wish to attach to the designs they share. 3D printers, laser cutters, milling machines and many other technologies can be used to physically create the files shared by the users on Thingiverse.) 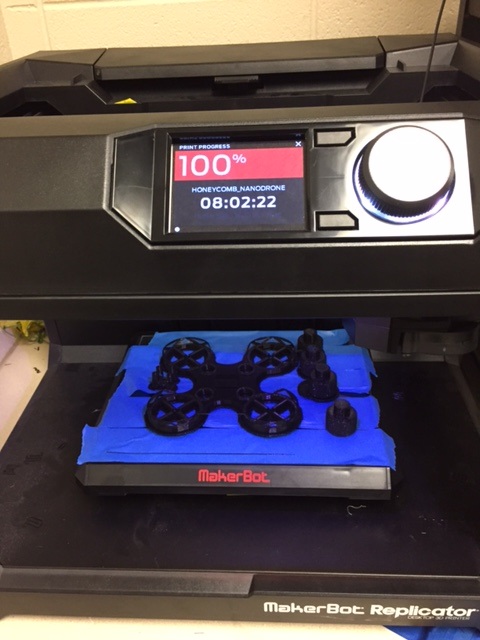  The Student responsible for this design, Vince, is heading into eighth grade next year and created this design using TinkerCad.com which is a free browser based software. We use Tinkercad because it is user friendly and easier for some of the younger students to operate than SolidWorks. We teach both programs and let the students decide which fits their needs and skill set. Vince loves his nano and micro quadcopters and used measurements from his Blade Nano QX as his guide when creating this quadcopter modification.  Vince borrowed and attributed part of his design to http://www.thingiverse.com/thing:9095. The portion he borrowed are the nuts which are in the body of the quadcopter and the bolts pictured here which screw into the open holes in the drone body. It allows him to have removable landing gear that can also be adjusted to various heights. Unfortunately we ran out of time to do full scale testing and modification so flight videos will have to wait until the school year resumes. The excitement and creativity this summer was inspirational as the students embraced the struggles of learning how to fly and the challenges we placed before them as up-and-coming designers. Closing Thoughts: As summer winds down and winter fast approaches in Wisconsin I am hopeful that the positive momentum created during summer school will carry over into the next school year for all of the students who took the opportunity to explore.
0 Comments
Week two and three of flight school were more of the same. Small incremental introductions into flight concepts and countless reminders about safety and protocol. We did introduce a few fun obstacle challenges for the kids as a way to show off their skills.

Next week will wrap up Summer School 2016 and with the final days of this week we have issued a challenge to our students. We have had some great achievements in flight and some pretty awesome crashes along the way and our equipment is starting to look tattered. We are fortunate enough to have four 3D Printers at our disposal and have worked with Solid Works and Tinkercad to introduce our students into drone/quadcopter designs. With the remaining time in our program we will tackle the concepts of form vs. function and how they apply to things like aerodynamics, prop-wash, and weight as we redesign our prop guards and try to fabricate some new and improved drone accessories.
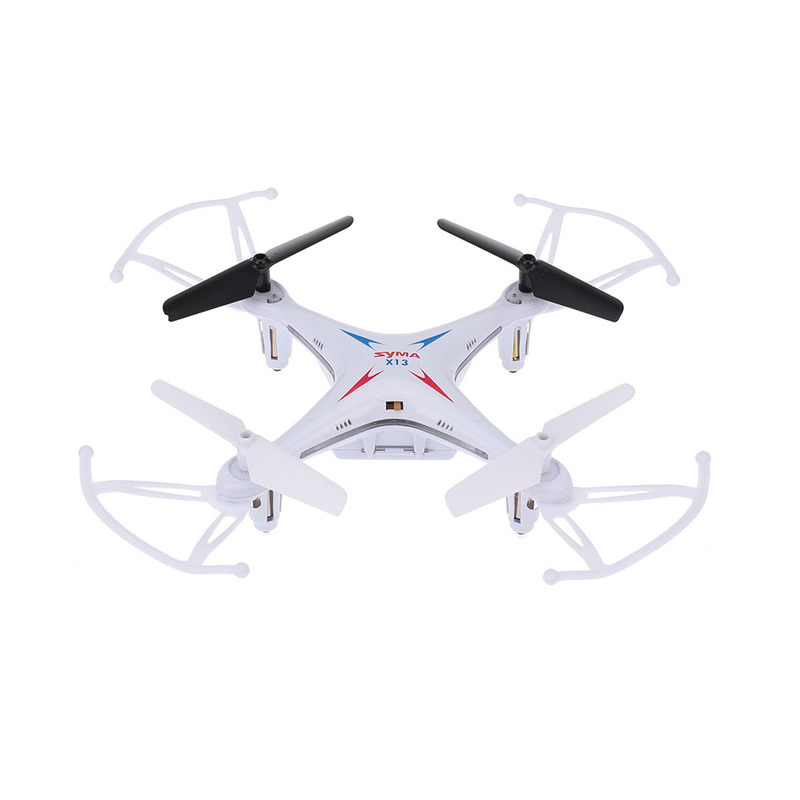
Start small and have control was the focus of our first week of flight school. Students practiced flying 1-6 inches off the ground and tried to maintain a steady altitude while remaining in the 3 foot box we had marked on the floor. Pictured below is the training drone we are using the SJ X300-1 which is very affordable and can be found HERE, with the price hovering around $17 for the cameraless version.

The next step in our flight evolution was working on linear flight from point A to point B. Once students were able to fly down the hallway and back the difficulty level increased and we started working on how to use the quadcopters YAW to rotate and fly back to the original take off point. If you sit and think about how the controls work it is quite simple, however when you are in the moment operating the quadcopter it can be extremely difficult to sync your mind with your hands.
Following a few days of flight and discussion we went outside to the football field to experience flight in the open. Some students took to the open flight parameters easily while others struggled to counteract the wind and other forces. At the end of the day it was a successful trip with only one quadcopter stuck in a tree and a singular drone loss due to a flyaway. After an extensive search the quadcopter was not recovered. Upon discussion with the students there was a break down in our spotter system leading to confusion as to where the drone actually traveled as it flew off. The silver lining in this situation is it reaffirms why we have established a spotter rule and we can have an open discussion on what happens when there is a break down of protocol. Our Edison Flight School Group Protocol is explained below and can be altered based on group size or other needs you may have.
Group Protocol:
At the end of the day the important thing to remember was kids flying drones=Engagement and excitement for learning! Our easy to use terminology guide will cover the basics of Quadcopters |


|
Tip # 2 Research, Research,Research. Don't just watch one YouTube video and start ordering. Think about what you plan on doing with the drones in your classroom. If you get a great deal on a drone and the extra batteries, charger, and parts are astronomically priced you will go broke quickly. Examine the cost of ownership of the item since chances are you will need to use the drones year after year so maintenance and ease of repairs will be key. When it is time for me to place an order I always check the following sites as they usually have the best prices. 1) Banggood.com 2) Gearbest.com |

|

Tip # 3 Shop around.
Chances are if you are in a smaller city you will need to order all of your drones online. The earlier you find your drone of choice the better your chances of saving money. Drone prices vary like the wind and can have huge discrepancies in the pricing based upon the vendor. It is always more comfortable to go with what you know but saving $5-25 dollars per item is huge when you are preparing for a class. Lastly, figure out what the newest and greatest drone on the market is and look for its predecessor. Models that are 1-3 years old still work fantastically and usually only come with a few less bells and whistles then the newest thing. You can occasionally find price savings by going with last years models .
Chances are if you are in a smaller city you will need to order all of your drones online. The earlier you find your drone of choice the better your chances of saving money. Drone prices vary like the wind and can have huge discrepancies in the pricing based upon the vendor. It is always more comfortable to go with what you know but saving $5-25 dollars per item is huge when you are preparing for a class. Lastly, figure out what the newest and greatest drone on the market is and look for its predecessor. Models that are 1-3 years old still work fantastically and usually only come with a few less bells and whistles then the newest thing. You can occasionally find price savings by going with last years models .

Tip # 4 Keep It Simple.
Every kid in class will want to take the drone outside and test the limits of its range. This is a bad way to start a beginners journey into the hobby as they will most likely become frustrated and crash more often then not. A great way to start is by flying low and slow. Make a 3'x3' Box on the floor with some gym tape. Mark an X in the middle and challenge your students to fly between 1"-6" off the ground while staying within the box. If they can accomplish this task for the duration of a battery they are ready for the next step. As their skills progress and they become more proficient pilots create challenging courses or task for them to do that work on control.
Every kid in class will want to take the drone outside and test the limits of its range. This is a bad way to start a beginners journey into the hobby as they will most likely become frustrated and crash more often then not. A great way to start is by flying low and slow. Make a 3'x3' Box on the floor with some gym tape. Mark an X in the middle and challenge your students to fly between 1"-6" off the ground while staying within the box. If they can accomplish this task for the duration of a battery they are ready for the next step. As their skills progress and they become more proficient pilots create challenging courses or task for them to do that work on control.
Tip # 5 Become an Expert (Or Kind Of)
Kids have questions that will need answers. Be prepared to either know the information or where to find it. I recommend the later since spoon feeding information is not a great way to ensure understanding. Empower your students through your excitement for researching concepts. Become well versed in the vocabulary that is associated with drones and most importantly be ready to be up to date on the latest laws and regulations. Helping the students to understand the responsibilities of drone operation is paramount in preserving it as a hobby. It only takes a few unfortunate accidents to change any and all of the rules and regulations that govern hobbyist. You can find a link to the latest Drone regulations here:
Kids have questions that will need answers. Be prepared to either know the information or where to find it. I recommend the later since spoon feeding information is not a great way to ensure understanding. Empower your students through your excitement for researching concepts. Become well versed in the vocabulary that is associated with drones and most importantly be ready to be up to date on the latest laws and regulations. Helping the students to understand the responsibilities of drone operation is paramount in preserving it as a hobby. It only takes a few unfortunate accidents to change any and all of the rules and regulations that govern hobbyist. You can find a link to the latest Drone regulations here:
Stay up to date with the latest FAA news.
|

|
|

|
Author
Jason Keller
Archives
Categories
 RSS Feed

Click to set custom HTML


Click to set custom HTML
